


This project is under active development. Features, architecture and hosting strategy may evolve over time.
⚠️ Notice- 📑 Table of Contents
- 📝 Overview
- 💡 Concept
- 🚀 Key Functions
- 🛠️ Materials Required
- 🔌 Wiring Diagram
- 🔧 Connection Details
- 📂 Upload Requirements
- 👤 Author
- 📄 License
- 🤝Contributing
- ☎️Contact
Smart Irrigation System (SAI42) is a data-driven, ESP32-powered solution for automated plant watering. It continuously monitors:
- Environmental metrics: Temperature, humidity, rainfall, ambient brightness
- Plant metrics: Soil moisture
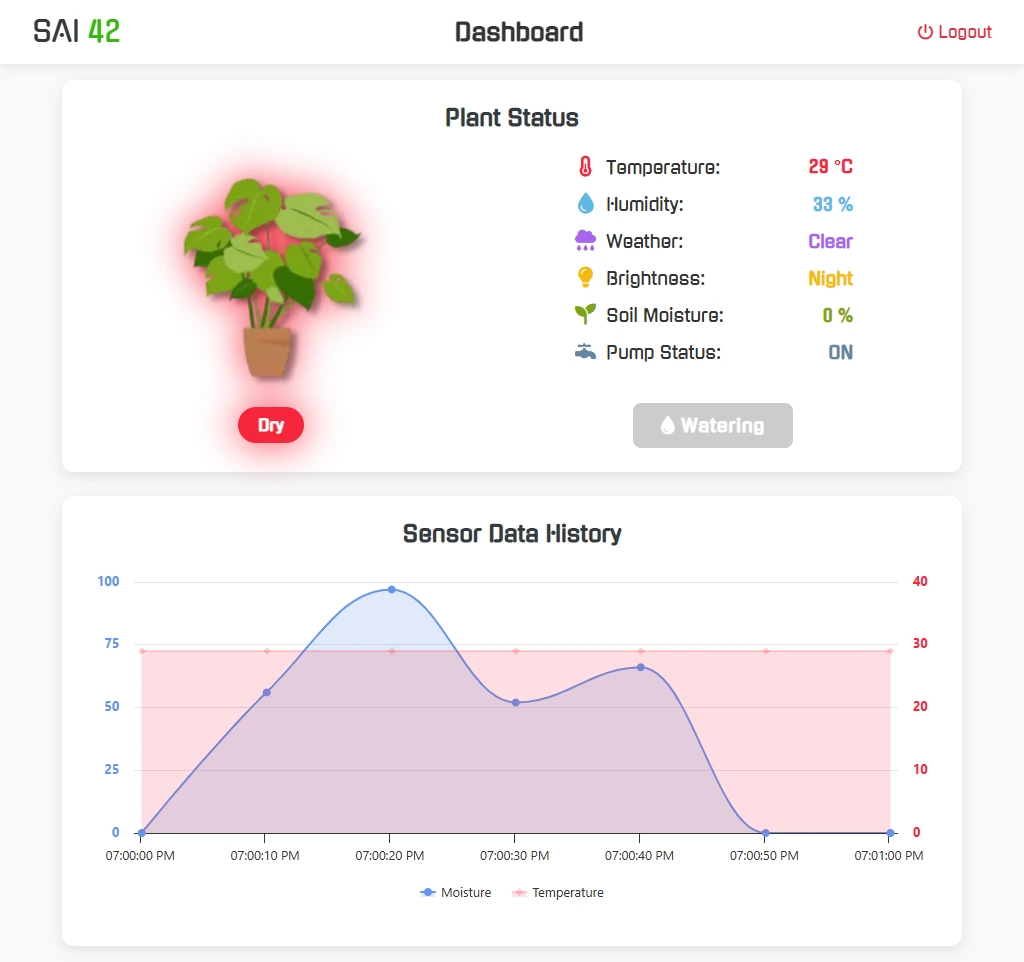
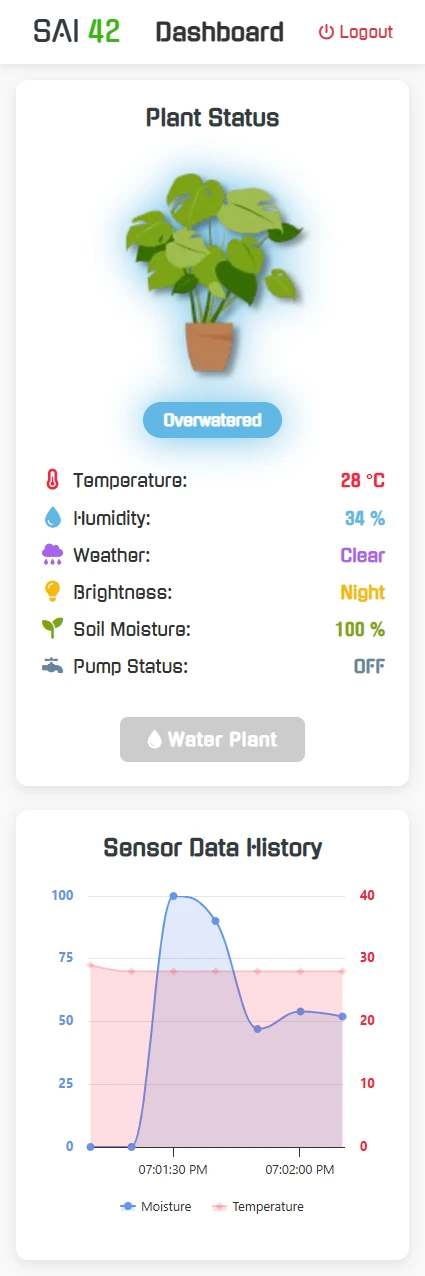
An intelligent threshold-based controller decides when to water, while a secure web dashboard provides:
- Live sensor readings & pump status
- Historical data logs & charts
- Manual override & alert notifications
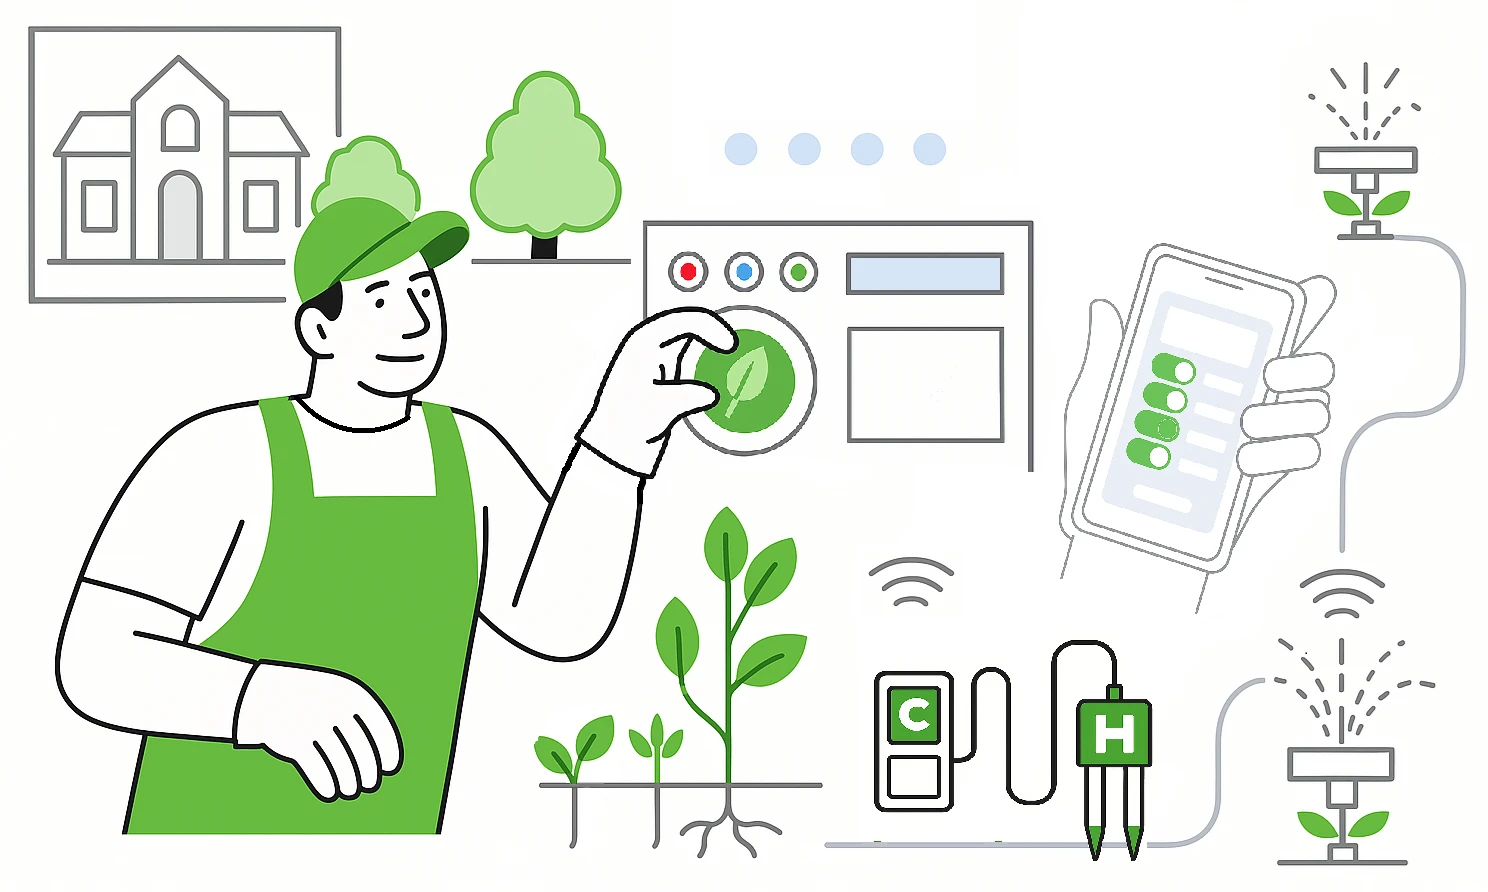
The system is organized into three layers:
-
Sensing Layer
DHT22, LDR, rain sensor & capacitive soil probe sample data every second via ESP32 inputs. -
Processing Layer
On-board filtering and threshold logic determine irrigation needs based on moisture and weather. -
Actuation & Control Layer
A relay switches the water pump; all readings and actions are logged to LittleFS for export.
ESP32 also hosts the web UI over Wi-Fi, enabling remote monitoring and control.
-
Real-Time Data Acquisition
- Temperature & Humidity: DHT22
- Ambient Light: LDR Module
- Rain Detection: Rain sensor
- Soil Moisture: Capacitive soil probe
-
Intelligent Irrigation Control
- Threshold algorithms trigger pump when soil is dry and no rain is detected
- Manual watering override via web UI or WebSocket command
-
Web Platform & IoT Integration
- Home Page: Project overview & features
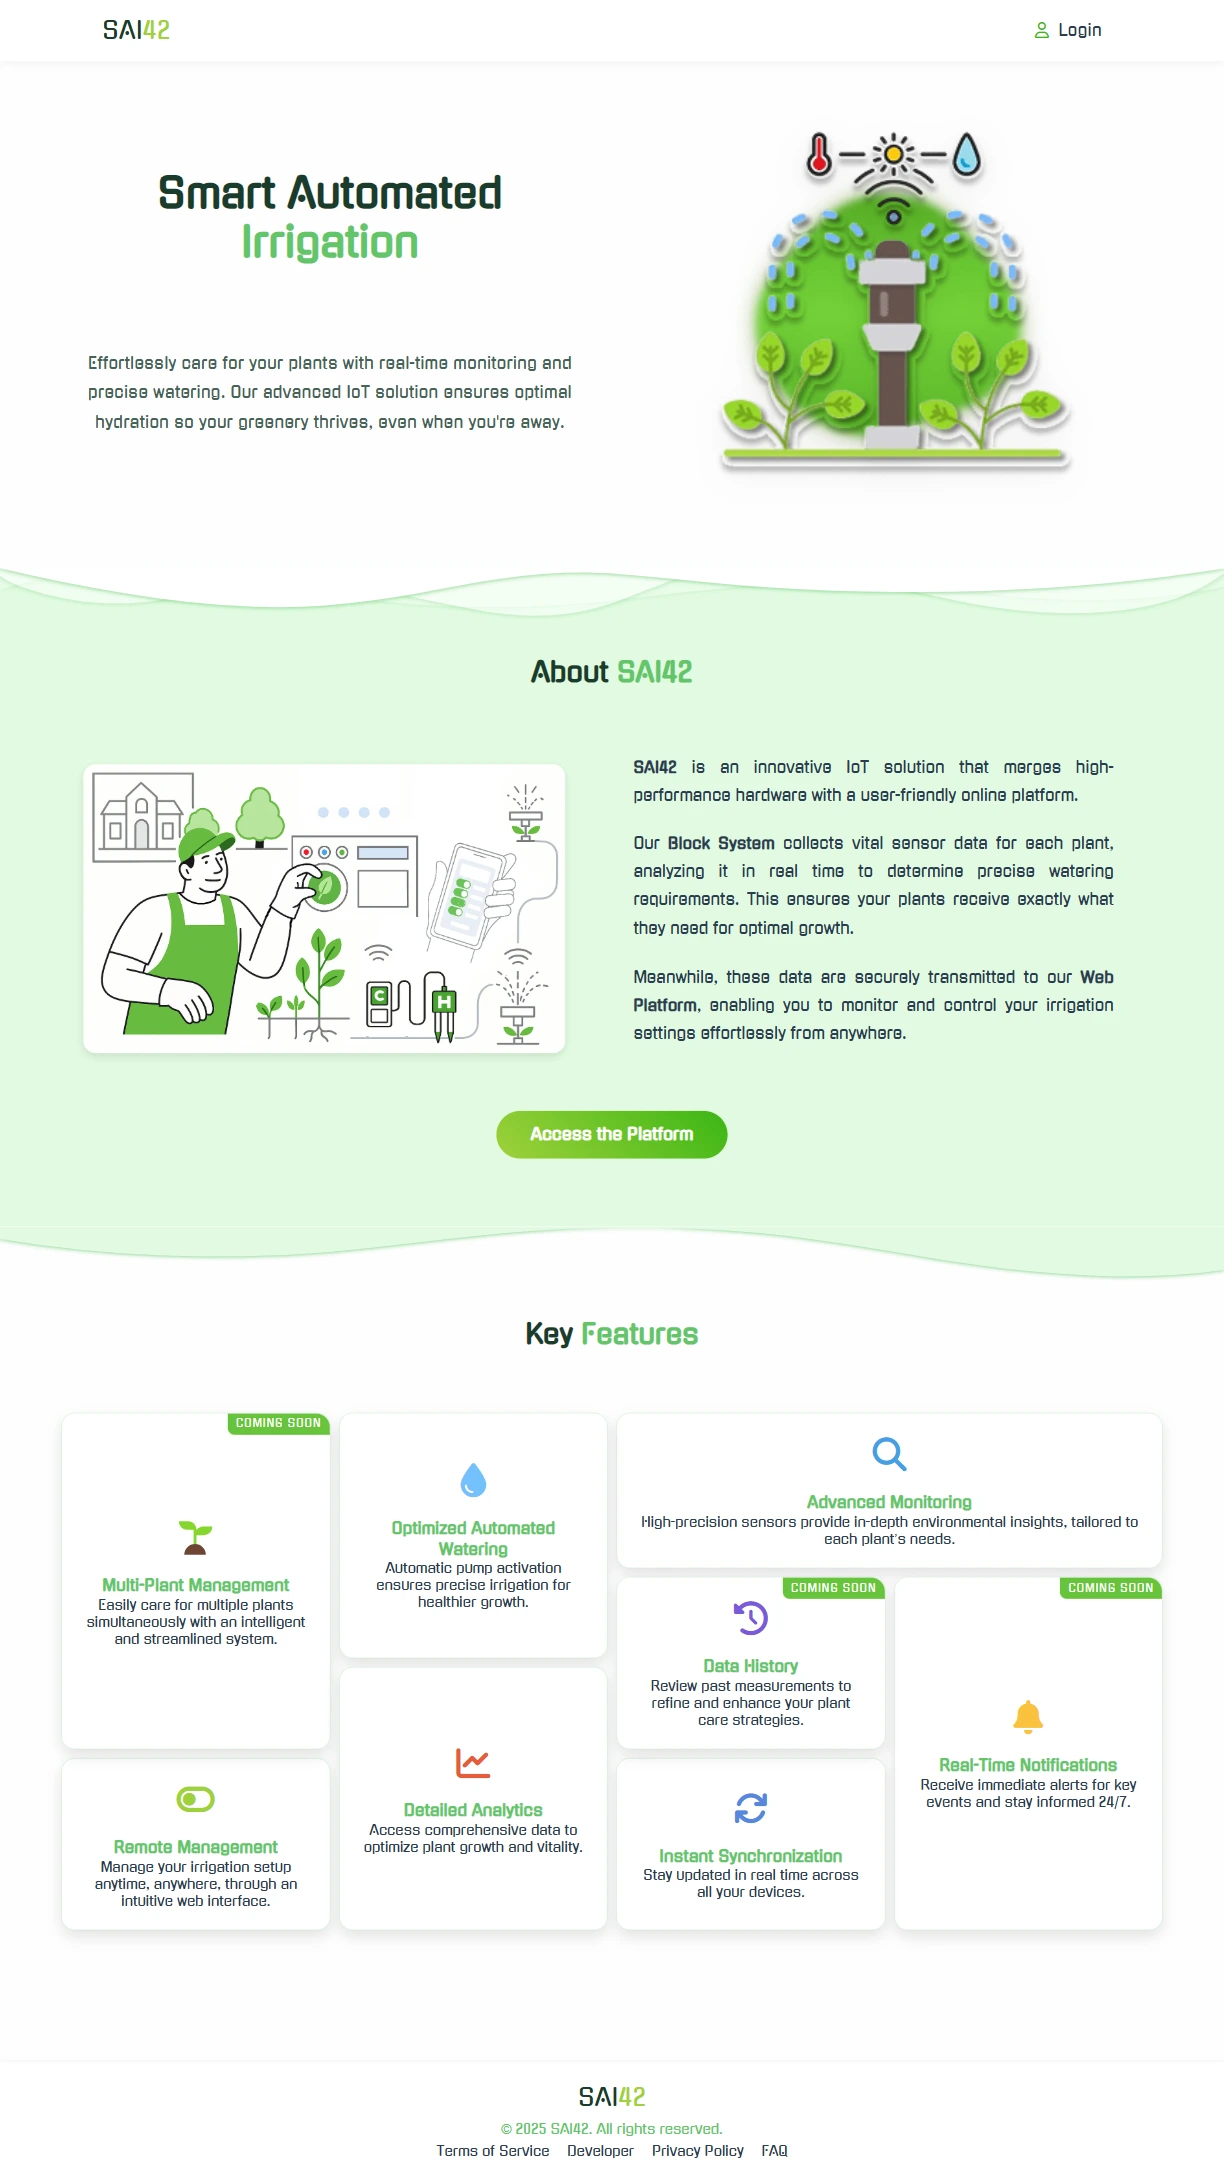
- Login Page: Secure authentication & credential recovery
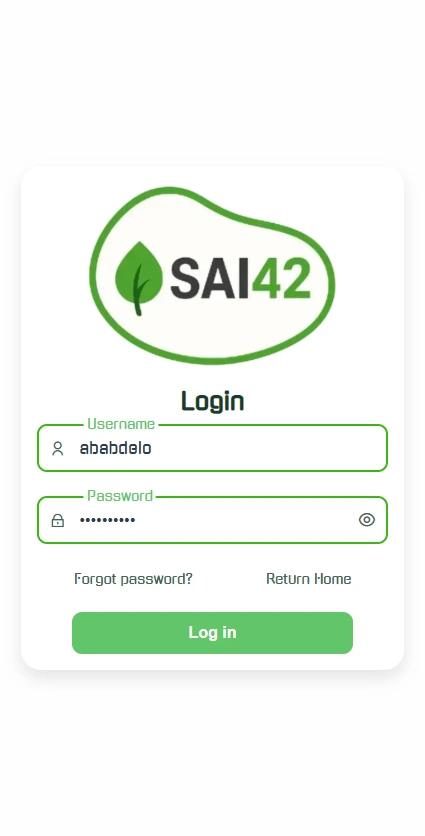
- Dashboard: Live data, pump control, WebSocket updates
- Home Page: Project overview & features
| Component | Qty | Description |
|---|---|---|
| ESP32 | 1 | Microcontroller & web server |
| DHT22 | 1 | Temperature & humidity sensor |
| Soil Moisture Sensor | 1 | Capacitive moisture probe |
| LDR Module | 1 | Ambient light detection |
| Rain Sensor Module | 1 | Rain detection digital module |
| 1-Channel Relay Module | 1 | Water pump switch |
| Water Pump | 1 | 5 V irrigation pump |
| LCD I²C Module (optional) | 1 | On-site status display |
| 3-Pin ON/OFF Switch | 1 | Main power control |
| LM2596 Regulator (opt.) | 1 | 5 V→3.3 V power regulation (opt.) |
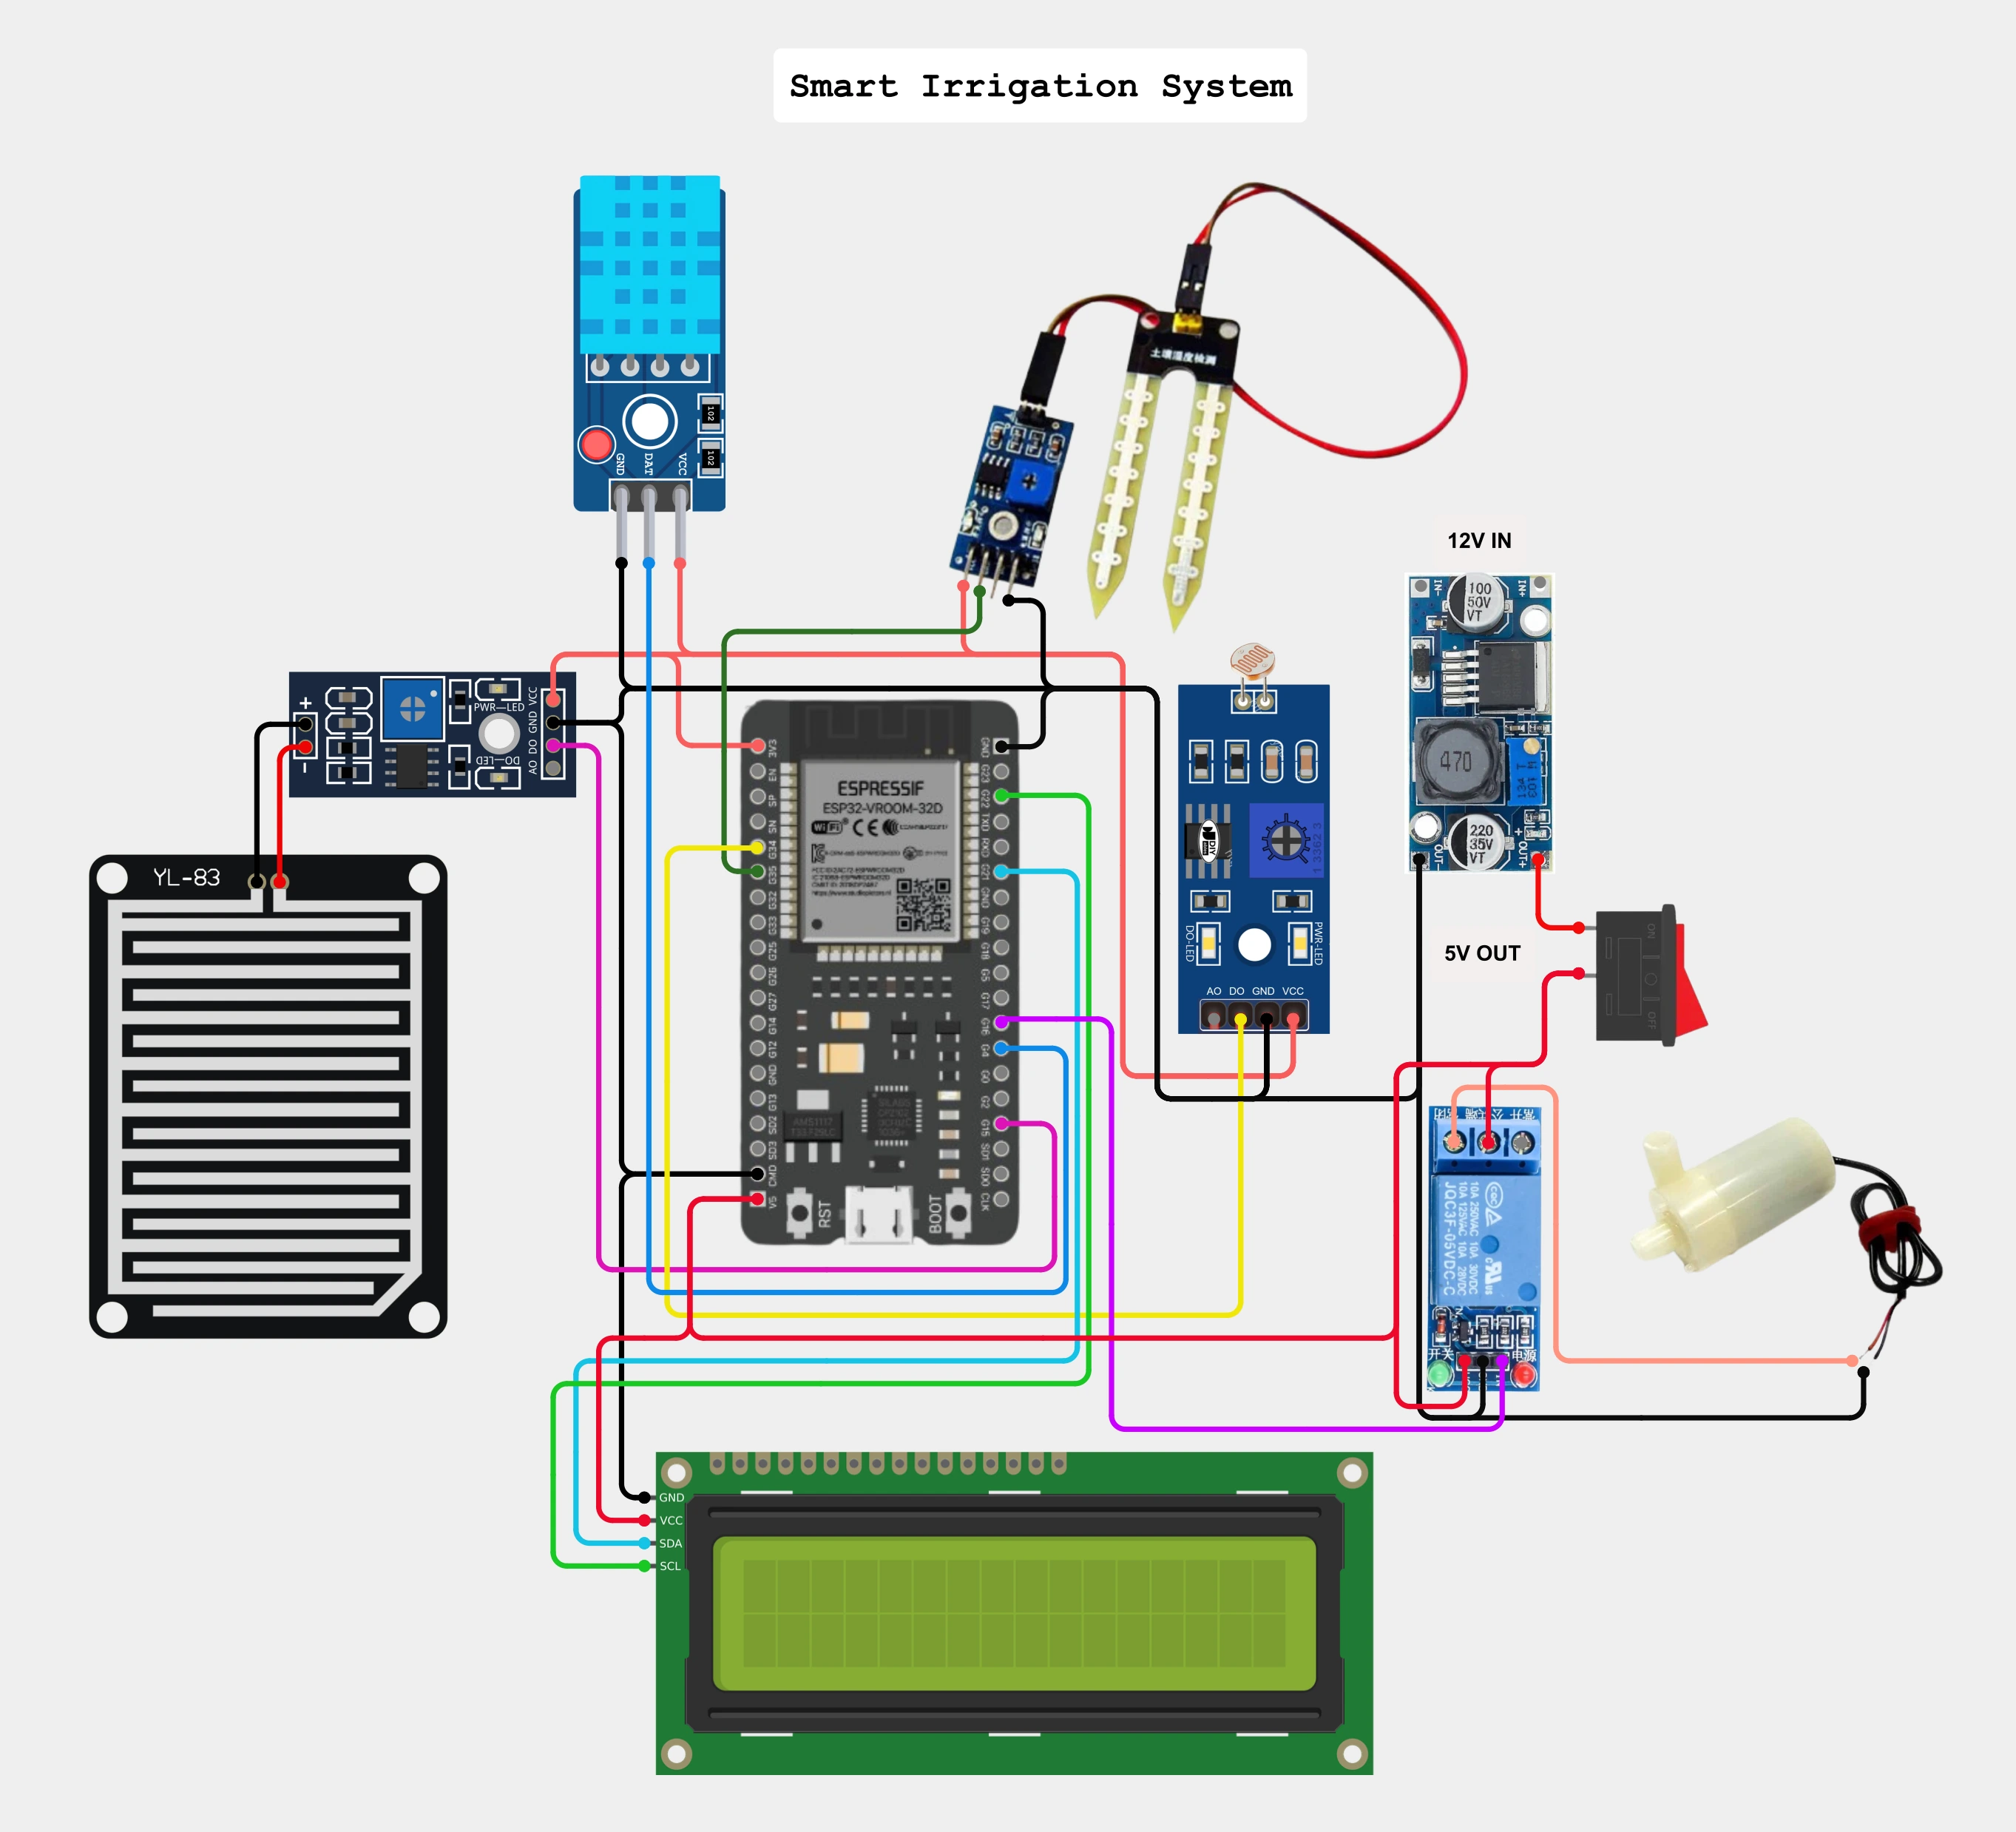
| Type | Module / Component | Wiring Notes |
|---|---|---|
| Sensor | DHT22 | Data → GPIO4 (pull-up), VCC→3.3 V, GND→GND |
| Sensor | Soil Moisture Sensor | Analog Out → GPIO35, VCC→3.3 V, GND→GND |
| Sensor | LDR Module | Voltage Divider → GPIO34, VCC→3.3 V, GND→GND |
| Sensor | Rain Sensor | Digital Out → GPIO15, VCC→3.3 V, GND→GND |
| Actuator | Relay Module | IN → GPIO5, VCC→5 V, GND→GND (common with ESP32) |
| Actuator | Water Pump | Powered by 5 V rail; relay NO/COM in series with pump ground |
| Display | LCD I²C | SDA→GPIO21, SCL→GPIO22, VCC→5 V, GND→GND |
| Power Rails | ESP32 VIN | 5 V supply (LM2596 or USB) → VIN, GND→GND |
| Power Rails | 3.3 V & GND | Shared by all sensors (do not exceed 3.3 V on ESP32 GPIOs) |
| Power Rails | 5 V Rail | Relay, pump & display power; common GND with ESP32 |
-
Arduino IDE
- Install latest stable version of Arduino IDE.
- Install ESP32 USB-to-Serial Bridge Driver (either CP2102 or CH340G) if not already installed.
- Install ESP32 board support: Getting Started with ESP32
-
Libraries
ArduinoJson, AsyncTCP, ESPAsyncWebServer, LiquidCrystal_I2C, DHT sensor library, LittleFS, WebSockets -
Uploading Sketch
- Open the sketch in Arduino IDE and select the correct board and port from the Tools menu.
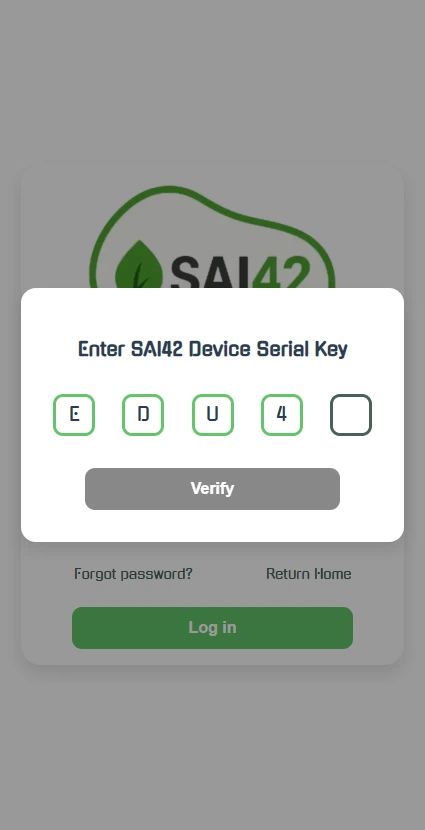
- Configure your SAI42 credentials in the
SAI42.inofile on the SAI42 object instance.
 /* Create the SAI object with 5 parameters:
 WiFi SSID, WiFi Password, admin username, admin password, and the device serial key. */
 SAI SAI42("SSID", "PASSWORD", "user", "admin", "E4D2U");
- Upload the sketch to the ESP32.
-
LittleFS Plugin
- Follow tutorial: Install ESP32 LittleFS in Arduino IDE 2.0
- After uploading your sketch to the ESP32, press
ctrl + shift + Pto open the command palette and selectUpload LittleFSto flash web UI files to the ESP32. - Open the Serial Monitor (Ctrl + Shift + M) and set the baud rate to 115200. You should see the ESP32 connecting to Wi-Fi and starting the web server.
- Browse to the IP address shown in the Serial Monitor or in the LCD display to access the web dashboard.
This project is developed by Abderrahmane Abdelouafi
This project is licensed under the ED42 Non-Commercial License v1.0. See the LICENSE file for more details.
Contributions and suggestions to enhance this project are welcome! Please feel free to submit a pull request or open an issue.
For any inquiries or collaboration opportunities, please reach out to me at:
Thanks for stopping by and taking a peek at my work!